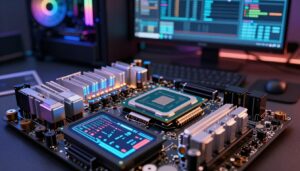
I’ll walk you through the basics of pushing a processor beyond its stock clock and getting real gains in performance. This short guide explains key concepts like base clock, multiplier, voltage, and temperature monitoring in plain language.
Before you begin, check temps in the BIOS or with a third-party tool. Modern computers have safeguards that shut down hardware if thermal limits are reached, but you should still confirm your cooling is up to the task.
What helped me stay safe while overclocking for the first time
When I first tried overclocking, I was more focused on gaining extra performance than on understanding the limits of my hardware. I increased the clock too quickly and didn’t pay enough attention to temperature, which led to instability during simple tasks. After that, I changed my approach completely and started following a slower, more controlled process. What made the biggest difference for me was treating overclocking as a gradual test, not a quick upgrade. I began increasing values in small steps, testing stability, and monitoring temperatures after every change, and that alone made everything much more reliable. In my opinion, the most important thing is not chasing the highest numbers, but keeping the system stable for daily use. A practical tip that I always follow now is to stop immediately if temperatures rise too fast or if the system shows any unusual behavior, instead of trying to push further. This mindset helped me avoid unnecessary risks and get consistent performance gains without damaging my hardware.
I cover unlocked Intel parts (K and X series) and all modern AMD Ryzen models, which offer built-in tuning options. You’ll learn practical steps for testing stability, watching core temps, and adjusting settings in a way that minimizes risk.
Key Takeaways
- Understand base clock and multiplier before making changes.
- Monitor temperature and voltage to protect your hardware.
- Use small, steady steps and stress tests for stability.
- Know your motherboard and firmware options in BIOS.
- Ensure cooling and power delivery match your performance goals.
Understanding the Basics of Overclocking
I start with the fundamentals so you can make informed choices. Clock speed is measured in gigahertz (GHz) and tells you how many cycles a cpu performs per second. Each cycle is an electrical pulse that triggers work inside the processor.
What is Clock Speed
I define clock speed as the processor’s heartbeat. It sets how many calculations the cpu can run per second.
The final throughput also depends on the core ratio, which multiplies that base clock into usable frequency.
Why Performance Increases
When you push a processor above factory specs, you raise the number of operations each second. That makes your computer feel snappier and speeds up heavy tasks like video editing or gaming.
Modern amd ryzen chips are often unlocked, letting users adjust core ratios and clock values for extra performance. Every cpu has manufacturer limits, and understanding them is the first step in this guide.
- Clock = cycles per second (GHz)
- Core ratio multiplies base frequency
- Higher clock rates increase real-world performance
Assessing Your Hardware Compatibility
I start by confirming whether your processor and motherboard expose the controls needed for tuning.
Not every chip supports manual multiplier changes. Check the model number in the BIOS or run a tool like CPU-Z to confirm unlocked status.
Intel parts ending in “K” or labeled “X” are the usual candidates. All modern amd ryzen models are unlocked and can offer clear performance gains for gaming and heavy tasks.
Verify your motherboard. Some boards lack the VRM quality or BIOS options needed for stable increases in clock and multiplier.
- Check the manufacturer’s site for processor features.
- Use CPU-Z to read base clock and current system values.
- Confirm cooling and power delivery before adjusting settings.
| Component | What to Check | Signs of Compatibility | Action |
|---|---|---|---|
| Processor | Unlocked multiplier | Intel K/X or modern amd ryzen | Proceed if unlocked; otherwise avoid manual tuning |
| Motherboard | BIOS options, VRM quality | Advanced BIOS menus, strong power delivery | Upgrade board if options are missing |
| Cooling | Thermal headroom | Low baseline temps, good airflow | Improve cooler before any changes |
| Tools | BIOS, CPU-Z, monitoring apps | Accurate base clock and sensor readings | Use tools for verification and logging |
Assessing hardware first prevents instability and protects your computer. This step ensures any later adjustments yield real speed and better overall performance.
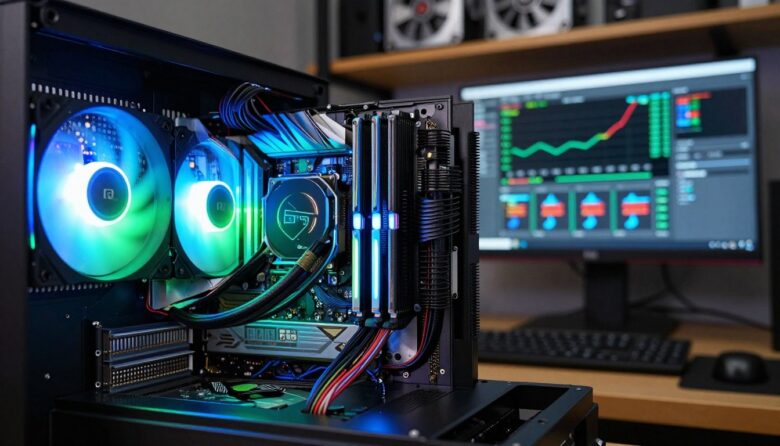
Preparing Your System for Higher Performance
Good preparation begins with cooling and a clean case. I make sure fans, airflow, and thermal paste are in good condition before any tuning. This gives the processor room to breathe and reduces risk during testing.
Importance of Proper Cooling
Cooling matters most. Heat causes thermal throttling and can shorten component life. I recommend verifying your cooler type—air, AIO liquid, or custom loop—and confirming it’s up to the task for gaming and heavy workloads.
- I run Prime95 as a stress test for one to two hours to confirm default stability.
- I use Cinebench to record a baseline performance score before changes.
- Clean fans and filters, reseat thermal paste, and check pump speeds for liquid solutions.
- Check BIOS fan curves and VRM temps so the motherboard supports higher clock and voltage targets.
| Check | Why It Matters | My Action |
|---|---|---|
| Cooling Type | Determines thermal headroom | Confirm air/AIO/loop and upgrade if temps are high |
| Stress Tools | Verify stability and performance | Run Prime95 and Cinebench for baseline and stress |
| BIOS Settings | Controls fan curves and power limits | Review and note current settings before changes |
How to Overclock CPU Safely
My approach favors patient, measured adjustments that protect components and yield consistent gains in real-world performance.
I start with a clear plan: pick small clock steps, run a stability test, then watch temps and voltages. I prefer manual tuning in the BIOS for precise control, though motherboard utilities can help as an initial step.
Heat is the real hazard. Extra frequency raises power draw and temperatures, so improve cooling first and monitor core temps during stress runs.
- Increase the multiplier or base clock in tiny increments.
- Run a 15–30 minute stress test after each change.
- If instability appears, back down or raise voltage only slightly.
- Note that Intel warns changes may void warranty; AMD Ryzen chips are unlocked and include optimization tools.
| Step | Action | Goal |
|---|---|---|
| Plan | Document current settings and temps | Safe rollback point |
| Increment | Raise clock in small steps | Find stable frequency |
| Test | Use stress apps and monitor cores | Confirm daily stability |
| Finalize | Set fan curves and save profile | Consistent gaming performance |
Accessing Your BIOS Settings
I walk you through the exact keypress and menu steps needed to reach your motherboard’s firmware and begin tweaking performance.
Restart the computer and press DELETE, F2, or F10 repeatedly during startup. That simple step usually drops you into the BIOS or UEFI interface.
Windows 10 users: open Settings > Recovery > Advanced startup and choose UEFI Firmware Settings if the keyboard shortcut fails.
Most boards show an EZ Mode for basic views and an Advanced Mode for full overclocking controls. Look for an OC or Overclocking tab, then find Advanced CPU Core Settings or similar.
- I recommend saving your current settings as a profile before any changes.
- If the system fails to boot after an adjustment, reset the BIOS to factory defaults via the menu or jumper for recovery.
- When finished, use the BIOS exit option that saves changes so Windows boots with your new values.
Accessing BIOS settings is the foundation of manual tuning. Once inside, you control multiplier, clock targets, and voltage that shape real-world gaming and productivity gains.
Adjusting Multipliers and Voltage
I guide you through choosing multiplier increments and voltage adjustments that balance performance and longevity.

Finding the Right Multiplier
The final clock equals the base clock multiplied by your chosen ratio. That math is simple: base clock (usually 100 MHz) × multiplier = final speed.
You’ll increase the multiplier one step at a time, then run a short stress test after each change. This slow approach finds the highest stable value for your processor without risking crashes.
Managing Core Voltage
Voltage gives the silicon the power it needs at higher clocks. Start in the 1.20–1.35V range and never exceed 1.40V for daily use.
- Raise voltage in small increments. Too much volts raises temperature and reduces lifespan.
- Set Load Line Calibration to medium or high to prevent drops under stress.
- Adjust per-core multipliers if some cores run hotter; this can boost system performance without excess heat.
“Every chip is different — the silicon lottery affects the top stable multiplier and required voltage.”
Save your BIOS settings as a profile after each stable step. That makes rollback quick if later tests show instability. I recommend short stress runs and temperature checks after every change to protect your computer and hardware.
Running Stability and Stress Tests
A proper stress session reveals whether an increased clock holds up under continuous demand. I use a mix of Prime95, AIDA64, OCCT, and Cinebench to push the cpu and watch behavior.
Start with a 30-minute run. That minimum time shows if a tweak survives real-world loads. I monitor temps and voltages for the full duration so the system never surprises me.
I use CPU-Z and Geekbench to record a baseline, then rerun benchmarks after each successful run. If the computer crashes or shows errors, the setting is not stable and needs adjustment in the BIOS.
- I use Prime95 for full-core load and OCCT for mixed stress patterns.
- Cinebench gives a clear performance score you can compare with your baseline.
- Document each step, clock value, voltages, and max temps for future reference.
| Tool | Purpose | Minimum Run |
|---|---|---|
| Prime95 | Push cores to 100% for stability checks | 30 minutes |
| Cinebench | Measure single and multi-thread performance gains | Single benchmark run |
| OCCT / AIDA64 | Mixed-load and power delivery observation | 30–60 minutes |
If issues appear, reduce multiplier or raise voltage in small steps and retest. This testing stage confirms stability and ensures your system is ready for daily use.
Monitoring Temperatures and Cooling
Keeping temperature and fan data visible during testing helps me spot trouble early.

Normal idle temps usually sit between 40–65°C (104–149°F). Under load I aim for less than 85°C to avoid thermal throttling and lost performance.
If idle temperatures are high, that often points at excess voltage or poor cooling. I check voltages and reseat the cooler first, then review fan curves in the BIOS.
I use HWMonitor, Core Temp, and SpeedFan for real-time readings during a stress run. Watching sensors while I raise clock or voltage gives a clear picture of system limits.
| What I Watch | Acceptable Range | Action If High | Why It Matters |
|---|---|---|---|
| Idle temperature | 40–65°C | Check voltage, reseat cooler | High idle means wasted heat or too much voltage |
| Load temperature | <85°C | Lower clock, improve cooling | Prevents throttling and damage |
| Fan RPM / airflow | Manufacturer spec | Clean fans, adjust curves in BIOS | Maintains steady cooling under stress |
| Voltage spikes | Stable within set limits | Reduce Vcore or tighten LLC | Limits heat while keeping stability |
Monitoring is ongoing. After a stable step I log readings and revisit them over time. If temps stay high, consider a better cooler or case airflow upgrade for long-term speed and reliability.
“Regular checks of temperature and cooling are the best insurance for sustained performance.”
Troubleshooting Common Overclocking Issues
When tweaks cause trouble, a clear checklist helps me find fixes fast. I focus on crashes, high idle temps, and safe BIOS resets first.
Handling System Crashes
A blue screen under load usually points at instability. I lower the multiplier or raise voltage in small steps and run a short stress test after each change.
If crashes persist, I update drivers and firmware on the motherboard and in Windows. That often resolves compatibility issues that show up during cpu overclocking.
Managing High Idle Temps
High idle temperature often means voltage is too high or cooling isn’t working well. I check fan curves, reseat the cooler, and review thermal paste.
If a laptop is involved, I expect tighter limits and may accept lower clock targets for long-term stability and safe performance.
Resetting CMOS Settings
If a system won’t boot, clear the CMOS with the jumper or remove the battery for a minute. That returns the BIOS to factory settings and restores normal operation.
Keep a written record of your settings so you can reapply a known-good profile after recovery. This step is my last resort when base clock or other settings push the system past stability limits.
- Run a short stress test after each change.
- Use driver and BIOS updates before major tweaks.
- Document voltages, temps, and clock values for future reference.
“A calm, stepwise approach reduces risk and speeds recovery.”
Weighing the Risks and Benefits
Before any tweak, I weigh likely gains against real costs. A modest change can yield a 10–20% performance bump in gaming, video rendering, and heavy tasks.
Know the risks. Adjustments may void your warranty, and extra stress can shorten a cpu’s lifespan over many years. Modern technology includes safeguards that make catastrophic failure rare, yet limits still matter.
- I compare expected gains with current cooling and system age.
- I treat laptop tuning as inadvisable for most users because power and airflow are tight.
- I remember the silicon lottery: some processors, including many amd ryzen chips, scale better than others.
- I set realistic expectations for gaming performance and demanding tasks before changing settings.
“Small, deliberate steps and solid cooling let you judge if extra speed is worth the trade-off.”
I recommend documenting results and keeping a rollback plan. This way, your computer earns extra speed without surprise costs or regrets.
Conclusion
I close with clear, actionable reminders that keep performance gains steady and long lasting.
I wrote this guide so you can make confident choices while tuning a CPU and tracking meaningful results. Be patient, take small steps, and record each change.
Prioritize cooling and stability. Good airflow and sensible fan curves matter more than chasing top numbers. Run tests and watch temps before calling any setting final.
If you follow these steps, you should see real performance improvements in games and heavy apps. Keep a rollback plan and enjoy the faster system with peace of mind.
FAQ
What is clock speed and why does it matter?
Clock speed is the rate at which a processor executes instructions, measured in gigahertz. Higher clock rates often mean faster responses in games and apps, but real-world gains depend on cores, workload, and memory. I check both base clock (BCLK) and multiplier when judging expected gains.
Will boosting processor settings void my warranty?
Many manufacturers like Intel and AMD provide clear warranty rules—some allow unlocked chips (like Intel K-series and AMD Ryzen) for modification while others do not. I always read my CPU and motherboard warranty terms before making changes.
What hardware do I need before I change clock rates?
You’ll need a quality motherboard with a robust VRM, a good cooler (air or AIO liquid), updated BIOS, and reliable power supply. I also recommend monitoring tools and stress-test software like Prime95 or Cinebench.
How should I prepare the system before starting?
Back up important data, update BIOS and chipset drivers, and ensure stable room temperatures. I disable background apps during testing and create a restore point in Windows for safety.
Is BIOS the only place I can adjust multipliers and voltage?
BIOS offers the most control and reliability for modifying multipliers and core voltage. Some vendors provide Windows utilities, but I prefer BIOS for stable, repeatable settings.
How do I find the right multiplier for my processor?
Increase the multiplier in small steps, then run short stress tests after each change. I stop when stability fails or temperatures approach safe limits, then back off one step and test longer.
What’s the safe way to manage core voltage?
Raise voltage minimally to achieve stability, watching temps closely. I never exceed manufacturer-recommended limits and use incremental changes with stress testing between adjustments.
Which stress tests should I run and for how long?
Start with 30–60 minute runs using tools like Prime95, AIDA64, or Cinebench. For final validation, run 6–12 hours or overnight. I monitor for crashes, errors, and temp spikes throughout.
What temperatures are acceptable during stress testing?
Target staying at least 10–15°C below the CPU’s maximum TJmax. For many chips, keeping sustained temperatures under 85°C during heavy load is a good rule. I prioritize cooling upgrades if temps climb higher.
My system crashes under load—what should I do?
Lower the multiplier or raise voltage slightly, then retest. If crashes continue, revert to default BIOS settings and check cooling, RAM stability, and power delivery. I also look at event logs in Windows for clues.
Why are idle temperatures high after changes?
High idle temps often stem from aggressive voltage or wrong power-saving profiles. I enable C-states and load-line calibration properly in BIOS, and reduce voltage if idle temps stay elevated.
How do I reset CMOS if settings break the system?
Use the motherboard jumper, remove the coin-cell battery for a minute, or use the BIOS clear button if available. I always consult the motherboard manual for the exact procedure before doing this.
Can I improve gaming performance with modest tweaks?
Yes. Small increases in clock rate and ensuring stable RAM performance can yield higher frame rates. I balance clock boosts with thermals so gameplay remains stable over long sessions.
Are laptops good candidates for manual clock tweaks?
Laptops have tighter cooling and power limits, so gains are smaller and risks higher. I only adjust laptops if the model supports thermal/power profiles from the vendor and I accept limited headroom.
What tools do I use for monitoring and testing?
I rely on HWMonitor, HWiNFO, Core Temp for monitoring, and Prime95, AIDA64, Cinebench for stress tests. For real-world profiling, I use games and productivity benchmarks to confirm performance improvements.
How long should I test a stable configuration before daily use?
After reaching a stable configuration in short tests, I run an extended stress test of 6–12 hours. If the system passes without errors and temps stay controlled, I consider it safe for daily use.
What are the main risks versus benefits I should weigh?
Benefits include higher frame rates and faster task completion. Risks include higher temps, component wear, and potential warranty issues. I weigh expected gains against cooling, power, and longevity before proceeding.
Can memory and motherboard limits affect results?
Absolutely. RAM speed and timings, VRM quality, and BIOS features limit achievable clocks. I evaluate the whole platform—CPU, cooler, motherboard, and PSU—when aiming for reliable boosts.
Where do I find official guidance for my specific processor?
Check manufacturer resources from Intel, AMD, and your motherboard vendor for BIOS guides and safe voltage ranges. I follow official docs and community-tested settings for my exact CPU model.

Adrian Wolfe is a hardware specialist focused on CPUs, system performance, and computing architecture. He provides detailed insights, benchmarks, and optimization tips to help users get the most out of their processors, whether for gaming, productivity, or high-performance workloads.