I build PCs and I know the small choices you make early can save hours later. Picking the right processor and board pair keeps your system stable and your gaming smooth.
In this guide, I walk you through how to identify the right hardware so you avoid common assembly errors. I explain how amd intel decisions and new CPU generations can affect whether a part will fit now or need an upgrade.
What I’ve Learned After Fixing Compatibility Mistakes
I’ve worked on a few builds where everything looked right on paper, but small details caused big delays. One time, I bought a newer processor assuming it would work with my existing board since the socket matched, but the system wouldn’t even boot until I updated the BIOS. That experience taught me that compatibility goes beyond just physical fit—firmware and chipset support matter just as much. In my opinion, the biggest mistake people make is rushing the purchase without checking the manufacturer’s support page. It only takes a few minutes to confirm details, and it can save hours of troubleshooting later. If I can give one practical tip, it’s this: always verify the exact CPU model against the motherboard’s official support list and BIOS requirements before buying. It’s a simple habit, but it makes your build process smoother and far less stressful.
When you start a build, I recommend checking the board and CPU mounting details first. That step ensures your components will work together and keeps your gaming pcs running without surprises.
Key Takeaways
- I show how to pair your processor with the correct board to prevent installation issues.
- Confirm the board’s mounting type and the CPU generation before buying parts.
- Intel and AMD may change support between generations, so verify before you purchase.
- Even experienced builders can miss small differences—this guide helps you avoid those pitfalls.
- Getting the fit right upfront saves time, money, and frustration when assembling your system.
Understanding Motherboard Socket Compatibility
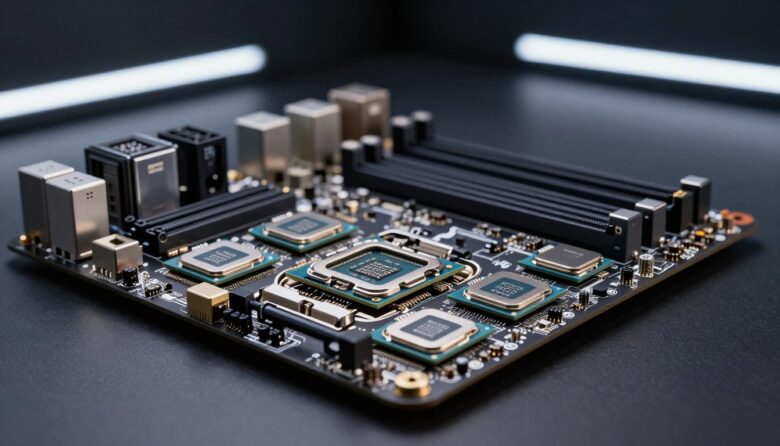
I want to make the mechanical and electrical link between a CPU and the board easy to grasp. A clear match between your processor and the board’s contact layout makes building simple and reliable.
The Role of CPU Sockets
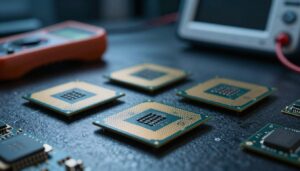
Sockets define which cpus will fit and how signals travel to the chipset. Intel uses the lga 1700 standard for 12th, 13th, and 14th generation chips, while AMD moved to the am5 socket for Zen 5 processors. Each has unique pin or land arrangements that must match the processor.
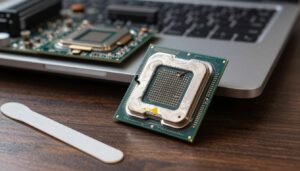
Mechanical Connections Explained
Physically, sockets provide the contact points and the form that secures the chip. PGA-style cpus are placed then latched. LGA designs use a surface plate that presses lands to pins on the board.
Thermal mounting is usually built into the design so the heat sink aligns with the contact area. That keeps cooling reliable across different generation parts.
| Feature | Intel (LGA) | AMD (PGA/LGA) |
|---|---|---|
| Common example | lga 1700 | am5 socket |
| Typical cpu fit | 12th–14th generation | Zen 5 processors |
| Mounting style | Surface plate (LGA) | PGA insertion or LGA lands |
- Every cpu needs the right contact layout to function.
- The mechanical form dictates how you secure your processors to the board.
- Check chipset support to ensure communication with your chosen cpus.
Why Socket Matching Matters for Your Build
A tiny mismatch between parts can stop a rig from ever powering on. I’ve seen builders try to pair a 2020 X570 motherboard with a 2017 Ryzen 5 1600x cpu and the system refuses to boot.
Even when a board will boot, the wrong physical type can block feature access. Some chipsets and connected devices cannot fully use an installed cpu. That limits cooling, PCIe lanes, and overall performance.
The contact form is the core mechanical link. If the contact pattern on the board doesn’t match the processor, initialization fails. Proper matching keeps your gaming rig stable and fast.
| Issue | Example | Effect |
|---|---|---|
| Wrong physical fit | X570 with Ryzen 5 1600x | No boot |
| Partial support | New cpu on older chipset | Reduced features, lower performance |
| Correct match | Board and cpu same contact form | Full features, stable gaming |
- I advise always verifying the board and cpu form before purchase.
- Match the sockets and chipsets to avoid surprises during assembly.
Identifying Your Current Hardware Specifications
Before you swap parts, I always check what your current system actually has installed. Start by making a short list: the board model, installed cpu, and the firmware version. This simple step cuts guesswork and saves time.
Reading Manufacturer Documentation
Read the manuals. Your product guides show the exact socket type and supported cpu generations. I look for revision notes that name the LGA 1700 or am5 socket when checking newer processors.
- I recommend you always read the manufacturer documentation to identify the exact socket type required for your cpu generation.
- Look for installation notes—many vendors use the same back plates across product lines, which simplifies mounting.
- Verify the board model in the guide to confirm electrical and mechanical support for your components.
“Checking the manual before you buy prevents the most common installation errors.”
| Check | Why it matters |
|---|---|
| Board model | Shows supported processors and revisions |
| CPU model | Confirms generation and electrical needs |
| Manual notes | Explains mounting and product-specific steps |
Common Pitfalls When Mixing CPU Generations
Mixing older and newer CPU generations often creates surprises that stop a build in its tracks.

One frequent problem is assuming all processors from the same brand will work on a given motherboard. I’ve seen people buy a new cpu only to find the board needs a firmware update first.
Even when the physical socket matches, internal chipsets may not recognize newer processors. That mismatch can leave your system refusing to boot or running with reduced features.
Check for BIOS updates before installing a new chip. Many boards require a specific bios version to support later generation cpus.
- I recommend verifying release notes and vendor pages for update steps.
- Keep a spare supported cpu or a vendor tool if your board needs an in-place bios flash.
- Don’t assume identical-looking sockets guarantee full feature support for gaming builds.
My rule: confirm firmware and chipset support first, then fit the physical parts. That saves time and frustration.
Essential Steps for Verifying Component Compatibility
I always double-check part revisions so new components install without surprises. That quick habit prevents wasted time when assembling a system for gaming or work.
Checking Socket Revisions
Start by confirming the board’s listed revision and the processor’s exact model. Many vendors publish revision notes that show which cpus and contact layouts are supported.
Tip: AMD AM4 platforms, for example, often list DDR4 and PCIe 4.0 support in their product pages.
Evaluating Chipset Features
Look beyond physical fit. Review chipset features like PCIe lanes, memory type, and native USB speeds.
Remember: Not every chipset supports every cpu feature without a BIOS update. Updating firmware is often required for newer processors.
Using Online Compatibility Tools
I recommend using tools such as PC Part Picker to check revisions and connection steps quickly. Those sites gather manufacturer charts and user reports to highlight supported combinations.
- Check the manufacturer website for product support graphs and BIOS notes.
- Verify whether a BIOS update is required before installing a new cpu.
- Contact the manufacturer if any product notes are unclear.
| Step | What to check | Why it matters |
|---|---|---|
| Revision | Board revision number, CPU model | Ensures contact form and electrical support |
| Chipset features | PCIe version, RAM type, USB speeds | Determines full feature access for gaming and storage |
| Tools | PC Part Picker, vendor pages | Quick cross-checks and reported user results |
Managing BIOS Updates for New Processors
When a new CPU arrives, the firmware on your motherboard may need an immediate update. I know that flashing a BIOS feels risky, but it often unlocks support for the latest processor generation quickly.

If the board does not recognize your cpu, many vendors list a specific BIOS version that adds support. Sometimes the fix is a simple USB flash from the official support page.
In rare cases the board needs an older processor to boot so you can apply the firmware. I’ve handled builds where that step was required to let the system accept new processors.
If you’re nervous, follow a trusted tutorial that matches your exact board model. Video guides often walk through the BIOS UI for each vendor, which makes the process easier.
- Tip: Check the manufacturer site for the correct BIOS file before you start.
- Option: Some gaming builders like Apex Gaming PCs handle BIOS updates for you, delivering tested systems.
- Fallback: Keep an older cpu handy if your board needs it to complete the update.
| Scenario | Action | Result |
|---|---|---|
| BIOS supports new processor | Download and flash latest BIOS | System boots with full features |
| BIOS needs update but board won’t boot | Install older cpu, flash BIOS, reinstall new cpu | New processors recognized |
| Prefer hands-off | Use a service like Apex Gaming PCs | QC-tested, drivers and firmware up to date |
When to Consider a Full System Upgrade
When your PC can no longer accept modern processors or firmware fixes, consider replacing the whole platform.
I recommend a full system upgrade when your motherboard’s manufacturer stops providing the bios updates required for modern cpu support.
Typical board revisions last about five to eight years. After that, new products and components often need firmware that the vendor no longer supplies.
A new custom-built gaming PC is usually the best option once updates end. Upgrading both the cpu and main board can deliver a large performance gain for modern gaming loads.
“When long-term support ends, rebuilding often costs less and delivers more than piecemeal fixes.”
- Upgrade if you can’t find compatible cpus for your current board.
- Choose new motherboards that add features you actually need.
- Consider manufacturer support and long-term updates before buying a product.
| Situation | Action | Result |
|---|---|---|
| End of bios support | Plan full upgrade | Access to latest features and improved performance |
| Components > 8 years old | Replace cpu and board | Noticeable gaming and multitask gains |
| No compatible cpus available | Build new system | Better long-term value and vendor support |
Conclusion
I aim to wrap up with clear, practical steps so your next gaming rig comes together smoothly. Check the socket and chipset notes on the product page before you buy. This simple step prevents most assembly headaches and helps your system deliver peak performance.
Always confirm whether a bios update is required to support a new processor or cpu generation. If an update is needed, follow vendor steps and keep a spare supported part handy when possible.
By following this guide you can avoid boot errors and get your gaming pcs running with full feature access. Thank you for reading, and good luck with your build and tuning.
FAQ
What is the main difference between AM5 and LGA 1700?
AM5 is AMD’s modern pin grid array design that accepts Ryzen 7000-series CPUs, while LGA 1700 is Intel’s land grid array used for 12th and 13th Gen Core processors. I suggest checking the CPU family and the board’s chipset before buying to avoid mismatch.
How do I know which CPU my board supports?
Start by reading the manufacturer’s documentation and the product page for your model. I also look up the exact chipset and revision number, then confirm supported processors on the vendor’s CPU support list to be safe.
Can a BIOS update allow a newer processor to work on an older board?
Yes, sometimes a firmware update adds microcode for later CPUs. I always verify the board’s BIOS changelog and follow the vendor’s update procedure—use the correct file and power source to prevent bricking.
Are chipset features like PCIe lanes and memory support important?
Very. Chipsets determine PCIe version, lane count, and RAM speed support. I check these specs to ensure my GPU, NVMe drives, and memory perform as expected with the chosen CPU and board.
What risks come from mixing CPU generations on the same platform?
The biggest risks are electrical or microcode differences that prevent booting, reduced performance from unsupported features, and potential instability. I avoid mixing unless the vendor explicitly lists support.
How do I check socket revisions and board revisions?
Look at the board’s model code on the PCB and the retail box; manufacturers note revision numbers (like v1.1). I compare that to the online support page where revision-specific CPU lists or BIOS files appear.
Are online compatibility tools reliable?
They’re a great starting point. I use official vendor tools and well-known retailers’ configurators, but I always cross-check with the motherboard maker’s CPU support list for final confirmation.
When should I replace the entire system instead of swapping CPUs?
If your desired CPU requires a different platform, new memory type, or an incompatible power delivery design, I consider a full upgrade. It often saves time and avoids repeated compatibility headaches.
How can I avoid voiding warranty during upgrades?
Follow the manufacturer’s instructions: use approved BIOS files, install supported processors, and avoid physical damage when handling chips or coolers. I document steps and keep receipts in case I need service.
Which resources do you recommend for verifying parts before purchase?
I rely on the motherboard maker’s CPU support list, AMD and Intel product pages, and reputable hardware sites like Tom’s Hardware or AnandTech. Retailer compatibility filters and community forums help fill gaps.

Adrian Wolfe is a hardware specialist focused on CPUs, system performance, and computing architecture. He provides detailed insights, benchmarks, and optimization tips to help users get the most out of their processors, whether for gaming, productivity, or high-performance workloads.