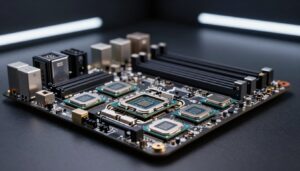
I’ll guide you through a careful, step-by-step approach that keeps your system safe while you handle the processor and heat sink. My aim is to help you keep your computer running cool and stable with clear, simple instructions.
I focus on safe removal of old paste and correct placement of the replacement so heat moves away from the chip as intended. This reduces risk of damage and improves long-term performance.
A small detail that made a big difference for me
I’ve done this process more than once, and I can say that the moment I started paying attention to the cleaning step, my results improved a lot. In one case, I thought I had applied the paste correctly, but temperatures were still higher than expected. When I opened everything again, I realized I had rushed the cleaning and left a thin residue behind. After taking a few extra minutes to clean both surfaces properly and applying a smaller amount of paste, the temperatures dropped noticeably. Since then, I always follow a simple rule: clean slowly, apply less than you think, and let the cooler do the work. It might feel like a small detail, but in practice it directly affects stability and noise levels. Taking your time during installation is what really protects your components in the long run, especially if you plan to use your system under heavy load.
You’ll learn which tools and cleaners I trust, and how to avoid common mistakes. I explain why the interface between the processor and sink matters, and what signs show poor thermal transfer.
Follow my steps and you can protect expensive parts while restoring proper cooling. I keep each step practical and easy to follow for readers in the United States.
Key Takeaways
- Remove old paste gently to avoid harming the processor pins or socket.
- Use a recommended cleaner and lint-free cloth for best results.
- Place fresh paste evenly for optimal heat transfer between chip and sink.
- Inspect the heat sink and mounting hardware before reassembly.
- Work slowly and ground yourself to prevent static damage.
Understanding the Importance of Thermal Compound
A microscopic layer makes the difference between safe operation and heat damage.
I use the thermal paste as the bridge that moves heat from the chip into the sink. This compound fills tiny valleys on both surfaces and prevents small air pockets from forming.
Luigi Oppido explains that the main goal is simple: transfer heat away from the processor and into the cooler assembly. Without that interface, trapped air acts like an insulator and raises temperatures fast.
- It conducts warmth across microscopic gaps.
- It prevents dangerous hot spots that can harm your computer permanently.
- Skipping this step leaves the surface uneven and inefficient.
| Function | Role | Consequence if Missing |
|---|---|---|
| Conduct heat | Bridge between chip and sink | Rapid temperature rise |
| Fill gaps | Eliminate air pockets | Reduced cooling efficiency |
| Protect parts | Ensure stable operation | Permanent hardware damage |
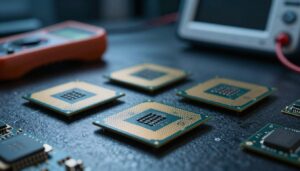
Essential Tools for a Clean Installation
Gathering the right kit makes the job safer and faster. I set up a clean work area and lay out every item before I touch any parts. A small set of quality supplies prevents contamination of delicate surfaces and saves time.
Cleaning Agents
Use high‑strength isopropyl alcohol for reliable results. I recommend isopropyl alcohol at 90% concentration or greater. It removes oils and old residue without leaving film behind.
- Isopropyl alcohol (90%+) — best for quick, complete cleaning.
- A dedicated electronics cleaner can help on stubborn spots.
- Keep a few cotton swabs for tight corners, but avoid loose fibers.
Lint-Free Materials
Choose a lint-free cloth or a coffee filter for wiping the sink and cooler surfaces. These options leave no fuzz that could interfere with contact.
“A coffee filter or lint-free cloth is often the simplest, most reliable choice.”
- High-quality lint-free cloth or coffee filters for wiping.
- Have spare cloths handy; reuse can reintroduce oils.
- Work on a clean mat or paper to keep parts free of dust.
Preparing Your Workspace and Safety Precautions
I always shut the power supply switch and clear my workspace before touching any internal parts of the computer.
Turn off the PSU and unplug the power cable. Even when the system is shut down, some power can remain on the motherboard. That residual charge can harm sensitive parts if you skip this step.
Work on a clean, static‑free surface. I use an anti‑static mat or a plain wooden table and keep pets and dust away. Small debris can settle on the processor or sink and interfere with contact.
Handle hardware with care and avoid touching gold contacts or exposed pins. A tiny amount of skin oil on a contact surface can block heat transfer and cause higher temperatures later.
Follow these safeguards as a simple, effective step that protects your investment. Take your time, ground yourself, and inspect mounts and fasteners before reassembly so each component sits correctly.
Removing Old Thermal Paste Residue
Begin carefully: separate hardened deposits first, then finish with a solvent wipe.
Scraping Techniques
I use the flat end of a plastic spudger to lift solidified thermal paste from the copper core of the heat sink and the processor. Work slowly and keep the tool flat so you do not gouge the surface.
I strongly advise against metal tools. Scratches from metal can ruin the delicate processor contact and damage the sink mating plane.
After scraping, I wipe the area with a coffee filter or lint-free cloth dampened with isopropyl alcohol. This removes remaining residue without leaving fibers behind.
Be extremely careful not to dislodge tiny components or let compound spread onto the motherboard. Keep loose material contained on a paper towel and discard it safely.
Once the main residue is gone, use a fresh piece of cloth and more alcohol for a final pass. The chip and sink surfaces should look clean and matte before any reinstallation.
Cleaning the Processor and Heat Sink Surfaces
Start by inspecting both metal faces under bright light. I look for dried residue, dust, or tiny scratches before I touch anything.
I use a fresh coffee filter or lint-free cloth dampened with isopropyl alcohol for the first wipe. Use a new piece each pass so you don’t reintroduce oils or fibers.
After cleaning, do not touch the surface with bare fingers. Skin oils will harm cooling performance and block proper contact.
- Use a clean cloth and more alcohol for a final pass to remove any last residue.
- Allow the sink and processor surfaces to dry completely before you continue; give it a few minutes of time.
- If the heat sink base is rough, wet‑sand with fine grit paper for improved contact and long-term performance.
Thorough cleaning ensures the new thermal paste can fill tiny imperfections. I take this step seriously because it affects temperatures and system stability when the cpu is back under load.
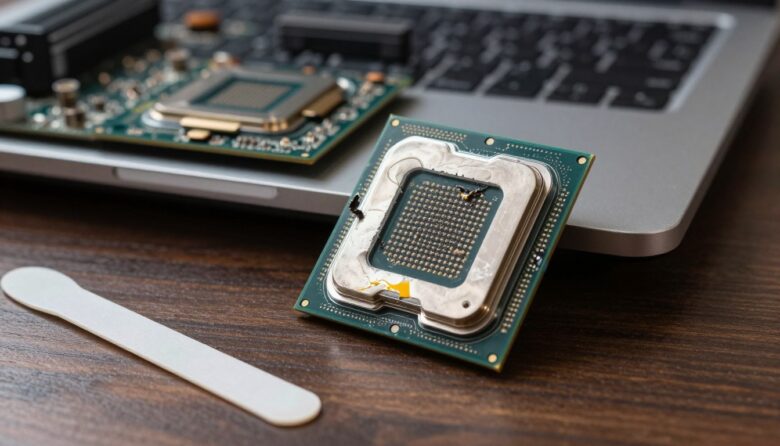
How to Apply Thermal Paste CPU Correctly
Placement matters more than quantity. I keep the bead very small—smaller than a BB or about the size of a grain of rice. That tiny amount gives excellent coverage once the cooler is seated.

The Dot Method
I place a single central dot on the chip. When the sink presses down, the paste spreads outward and fills gaps for full contact.
The Line Method
For long or rectangular chips I run a thin line down the center. Use a modest amount so excess does not squeeze onto the motherboard.
The Spread Method
If you prefer to spread the compound manually, wrap your index finger tip in a piece of plastic. Smear a thin, even coat across the core surface.
- Luigi Oppido notes circular coolers usually do not need manual spreading.
- If a tiny bit lands on the green processor surface, it won’t harm the board.
- Correct coverage ensures efficient heat transfer and steady performance.
Installing the Heat Sink and Cooler
Place the heat sink straight down with steady hands, then secure it in small, even steps.
I lower the cooler squarely onto the processor so the thin layer of compound spreads evenly across the surface. Gentle, even pressure helps the layer fill microscopic gaps without forcing excess onto nearby components.
Work slowly: tighten screws a little at a time in a cross pattern. I move from one corner to the opposite corner, then to the next pair, so pressure is balanced across the sink.
- Seat the cooler so mounts align and the contact layer covers the chip fully.
- Tighten in small increments, alternating corners for even compression.
- Avoid lifting the sink after seating; breaking the seal means cleaning and reapplying the compound again.
- Attach the fan and power cable carefully so no compound spreads onto the motherboard.
| Step | Action | Reason |
|---|---|---|
| Seat cooler | Align and lower straight down | Ensures full contact between sink and surface |
| Initial tightening | Turn each screw a quarter turn in cross pattern | Distributes pressure evenly, prevents warping |
| Final check | Confirm mounts are secure and fan connected | Prevents vibration and maintains long-term performance |
Verifying System Stability and Temperatures
After reassembly, my first check is a short boot and a quick look at temperature readings in firmware.
Monitoring BIOS Temperatures
I reboot the computer and press F1 or the Del key as it starts. That opens the BIOS screen where core numbers appear instantly.
I expect idle readings below 40°C. When temperatures stay under this threshold, the thermal paste and sink contact are likely correct.
I also watch the cooler fan. If the fan doesn’t spin, heat will build quickly and performance will suffer.
- Enter BIOS via F1 or Del after boot for immediate temperature checks.
- Confirm the cpu idle temp reads below 40 degrees Celsius for a healthy start.
- Ensure the cooler fan spins and shows no unusual noise or wobble.
- High idle numbers may mean the amount of compound was wrong or the sink is loose.
As a tech specialist, I recommend checking these values right after installation. Catching issues early saves time and prevents long‑term damage from poor heat transfer.

Conclusion
A small, careful touch now prevents big heat problems later. Regular maintenance and the right technique make a real difference. I keep the amount of thermal paste small and the work steady so contact is clean.
Proper cleaning and seating ensure the processor and heat sink meet across the entire surface. That lets the cooler move heat away efficiently and keeps fan speeds reasonable.
I hope this guide gives you confidence to care for your system. A quick check after reassembly protects your computer and extends the life of the cpu. Keep an eye on temperatures and repeat these steps as part of routine upkeep.
FAQ
What’s the safest way I can remove old compound from a processor?
I gently power down and unplug the system, remove the cooler, then use 90–99% isopropyl alcohol on a lint-free wipe (coffee filters or microfiber). I wipe in one direction, using fresh cloth sections until no residue remains. I avoid scraping metal pads and never let liquid drip onto the motherboard.
Which cleaning agent do I prefer for best contact?
I choose 90–99% isopropyl alcohol because it evaporates fast and leaves little residue. For stubborn paste I let a small soaked swab sit briefly, then wipe. I don’t use household cleaners or acetone that can damage plastics and coatings.
What lint-free materials work well when prepping surfaces?
I use microfiber cloths, coffee filters, or certified electronics wipes. They trap particles without leaving fibers. Cotton balls and paper towels shed and can reduce thermal contact, so I avoid those.
How much compound should I place before seating the cooler?
I place a pea-sized drop in the center for most desktop chips. For long rectangular dies (some Intel LGA or AMD Ryzen Threadrippers) I use a short line. The goal is a thin, continuous layer after mounting; excess squeezes out and can cause mess or poor contact.
Which method gives the most reliable spread — dot, line, or spread?
I prefer the dot method for standard dies because mounting pressure spreads it evenly. I use the line method for elongated dies. I only hand-spread with a flat plastic tool when reusing a cooler from a known-clean environment; otherwise I let the cooler do the work to avoid air pockets.
Can excess compound harm my system?
Excess paste usually just makes cleanup messier, but if the compound is electrically conductive (some silver-based products), it can short contacts. I remove visible overflow before powering up and always use non-conductive paste when possible around exposed pads.
How do I scrape off old, hardened residue without damaging the die?
I use a plastic scraper or an old credit card at a very shallow angle and avoid metal tools on the die. For heat sink residue I carefully scrape and then clean with alcohol. Patience matters — I make multiple soft passes instead of forceful scraping.
What safety steps do I take while installing a cooler?
I ground myself with an anti-static wrist strap or touch a grounded metal case. I work on a clean, well-lit surface, keep screws and brackets organized, and follow the cooler manufacturer’s mounting pattern and torque recommendations to avoid bending the board.
How soon should I monitor temperatures after installation?
I boot into BIOS or use a monitoring utility immediately after first power-up and during a short stress test. I watch idle and load temps for the first hour. If temps are unusually high, I shut down, reseat the cooler, and check the paste coverage.
Which tools are essential for a tidy job?
I keep isopropyl alcohol, lint-free wipes, a plastic scraper, thermal compound, a wrist strap, and the correct screwdriver set. Optional but helpful: a thermal paste syringe, thermal pads for surrounding components, and temperature monitoring software like HWMonitor or Core Temp.
How often should I replace compound for optimal performance?
I generally refresh paste every 2–5 years, or sooner if I remove the cooler, notice rising temperatures, or use an inexpensive compound that dries out faster. High-end paste can remain effective longer, but visual inspection during maintenance helps decide.
Is it OK to reuse old compound if I remove the cooler briefly?
I rarely reuse old material. Once disturbed, the layer can trap air or lose uniformity. I clean both surfaces and apply a fresh thin layer to ensure the best thermal contact and reliability.

Adrian Wolfe is a hardware specialist focused on CPUs, system performance, and computing architecture. He provides detailed insights, benchmarks, and optimization tips to help users get the most out of their processors, whether for gaming, productivity, or high-performance workloads.